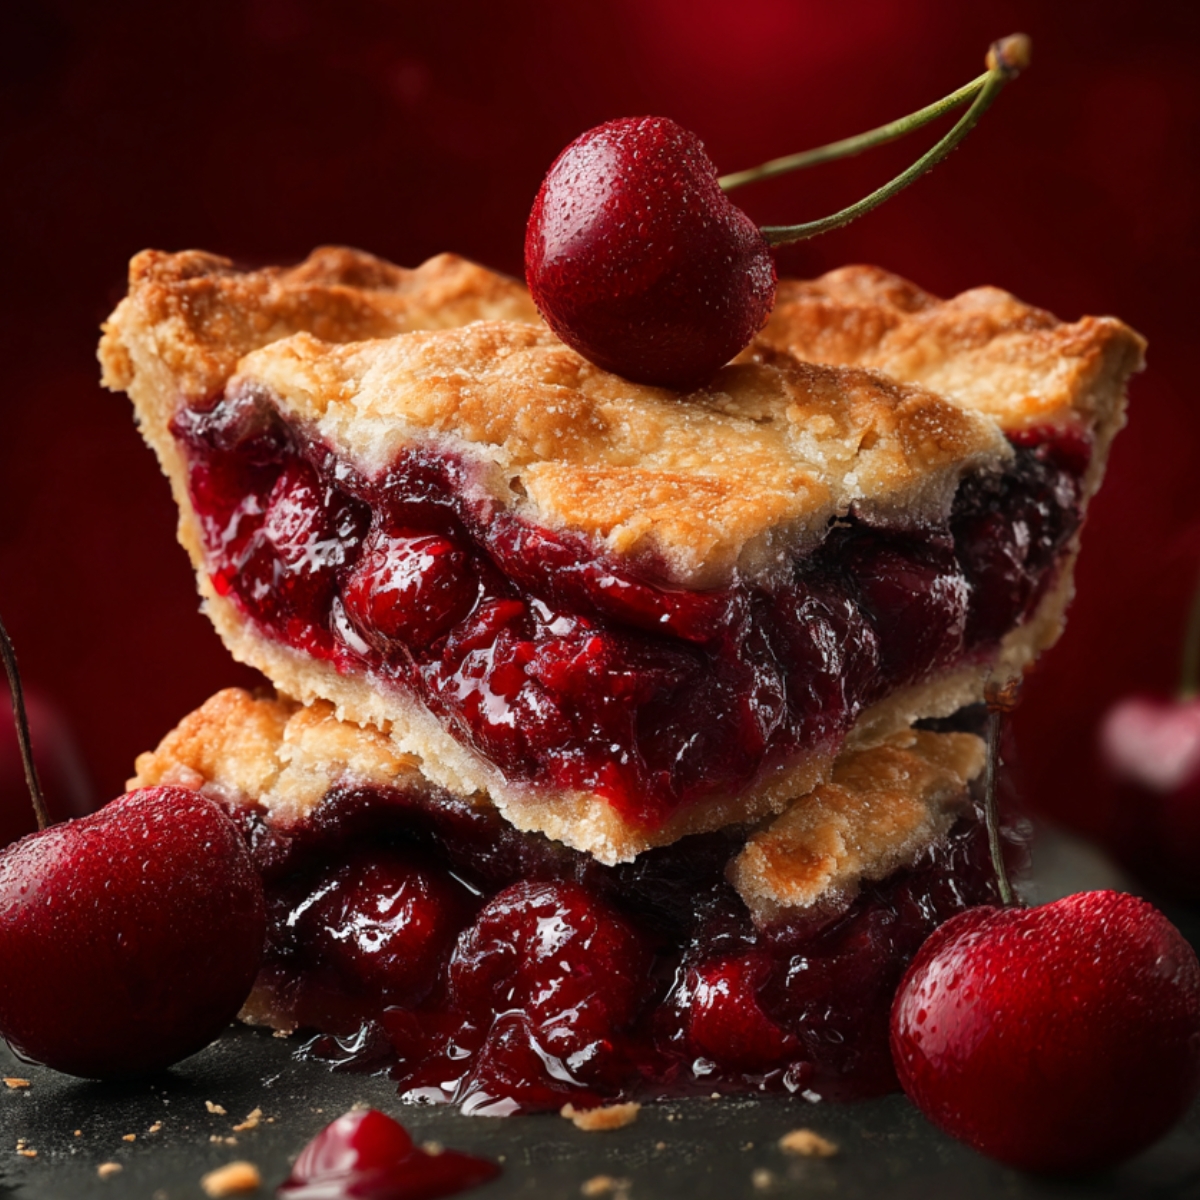
This cherry pie recipe has been our family's go-to summer dessert for three years running, and it all started with a complete disaster. Last July, when Safa helped me pick fresh cherries at the local orchard, we came home with way more fruit than I knew what to do with. My first attempt at cherry pie was a mess - soggy bottom crust, runny filling that leaked everywhere, and a top that looked like it had been put together by someone wearing oven mitts. Safa took one bite and politely asked if we could just eat the cherries plain next time.
Why You'll Love This Easy Cherry Pie
This cherry pie works for busy families because it doesn't demand perfection. You can make the crust ahead of time and keep it in the fridge for up to three days. The filling comes together in about ten minutes, and you don't need to worry about getting the lattice work perfect - rustic looks just as good. Safa likes helping with this part because even if he messes up the weaving, it still bakes up fine. What really convinced me to keep making this recipe was watching people's reactions when they taste it. My mother-in-law, who usually finds something to criticize about my cooking, went back for a second slice without saying a word.
The best part is how your house smells while it's baking. That combination of buttery crust and bubbling cherry filling makes everyone wander into the kitchen asking when it'll be ready. I've learned to make this on Sunday afternoons when we have time to enjoy the waiting and can eat it while it's still slightly warm with vanilla ice cream melting on top. Even Safa, who normally picks fruit out of everything, will eat this pie without complaining because the balance between tart and sweet hits that spot where kids don't make faces but adults don't feel like they're eating candy.
Jump to:
- Why You'll Love This Easy Cherry Pie
- Ingredients for Cherry Pie
- How To Make Cherry Pie Step By Step
- Smart Swaps for Your Cherry Pie Recipe
- Cherry Pie Variations
- Storing Your Cherry Pie
- Equipment
- Why This Recipe Works
- Top Tip
- They Kept It in the Family for Decades (Now It's Out)
- FAQ
- Time to Bake Summer's Best Dessert!
- Related
- Pairing
- cherry pie
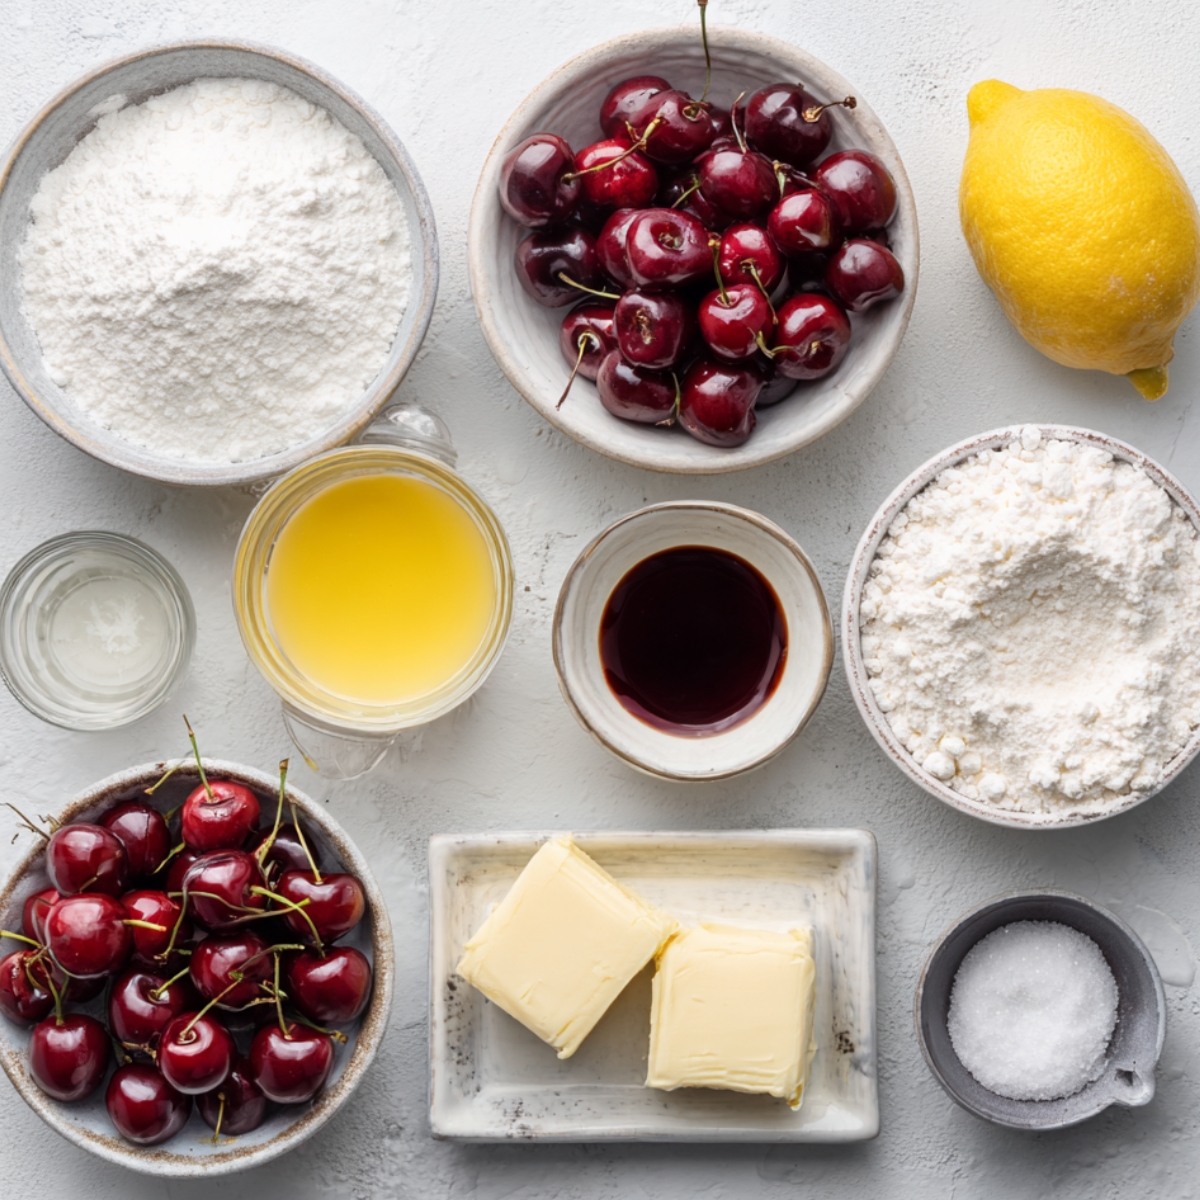
Ingredients for Cherry Pie
For the Cherry Pie Filling:
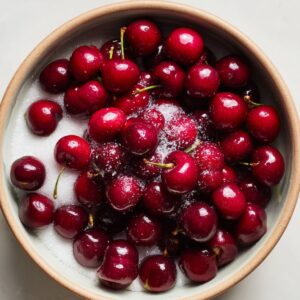
- Fresh tart cherries
- Granulated sugar
- Cornstarch
- Lemon juice
- Vanilla extract
- Salt
- Butter pieces
For the Pie Crust:
- All-purpose flour
- Cold unsalted butter
- Ice water
- Salt
- Sugar
Optional Extras:
- Almond extract
- Egg wash for golden top
- Coarse sugar for sprinkling
See recipe card for quantities.
How To Make Cherry Pie Step By Step
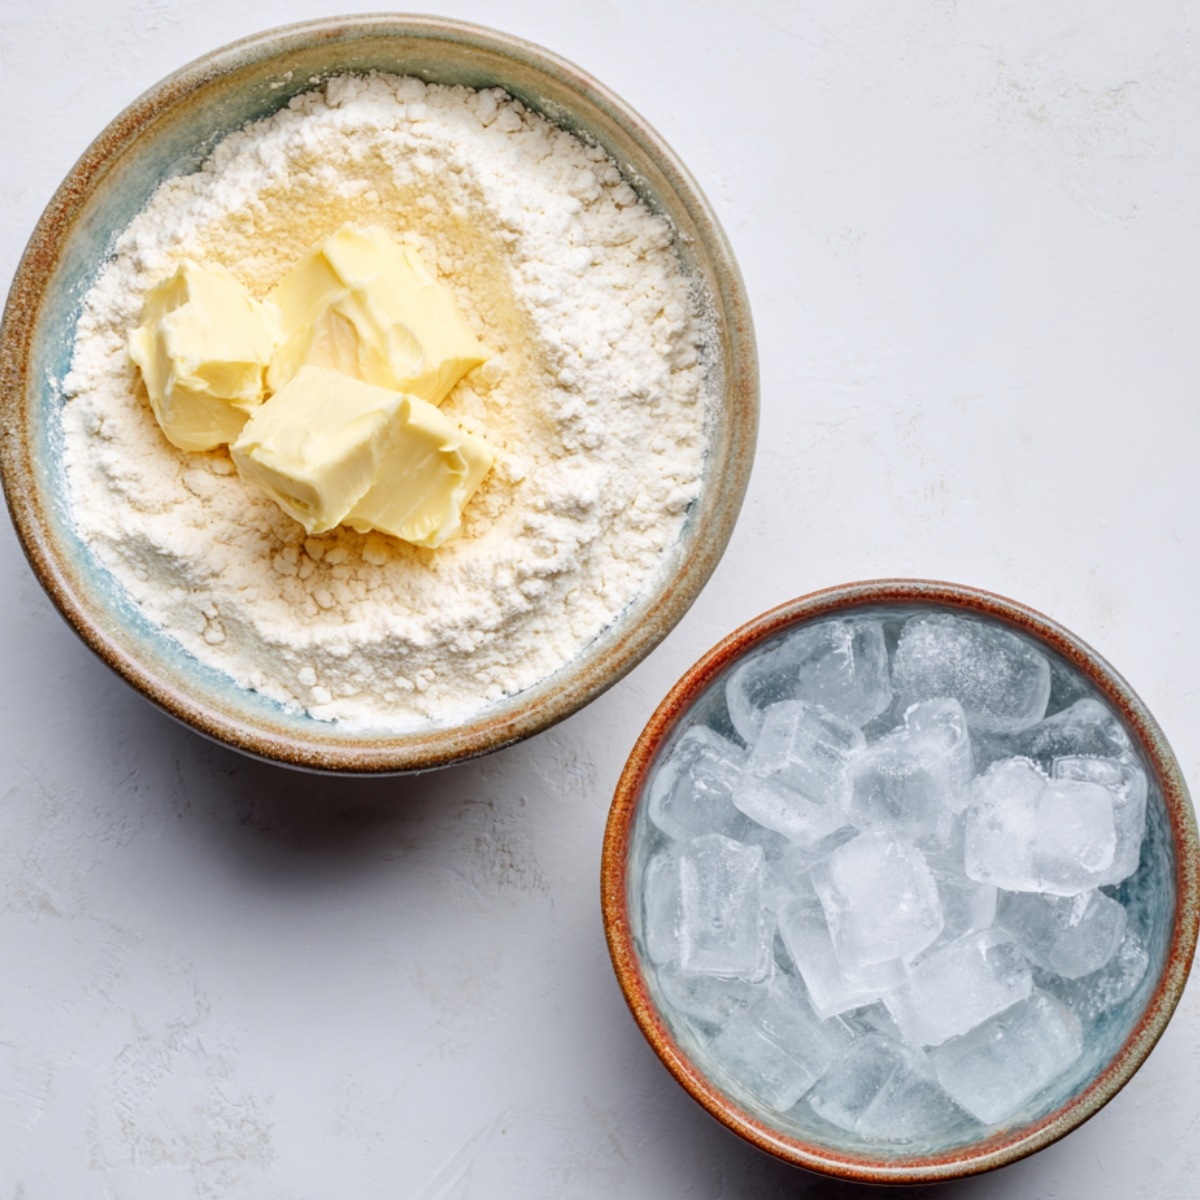
Make the Pie Crust:
- Cut cold butter into flour and salt until it looks like coarse crumbs
- Sprinkle ice water over mixture, one tablespoon at a time
- Mix gently until dough just comes together
- Divide in half, wrap in plastic, chill 30 minutes
- Roll out bottom crust and place in pie pan
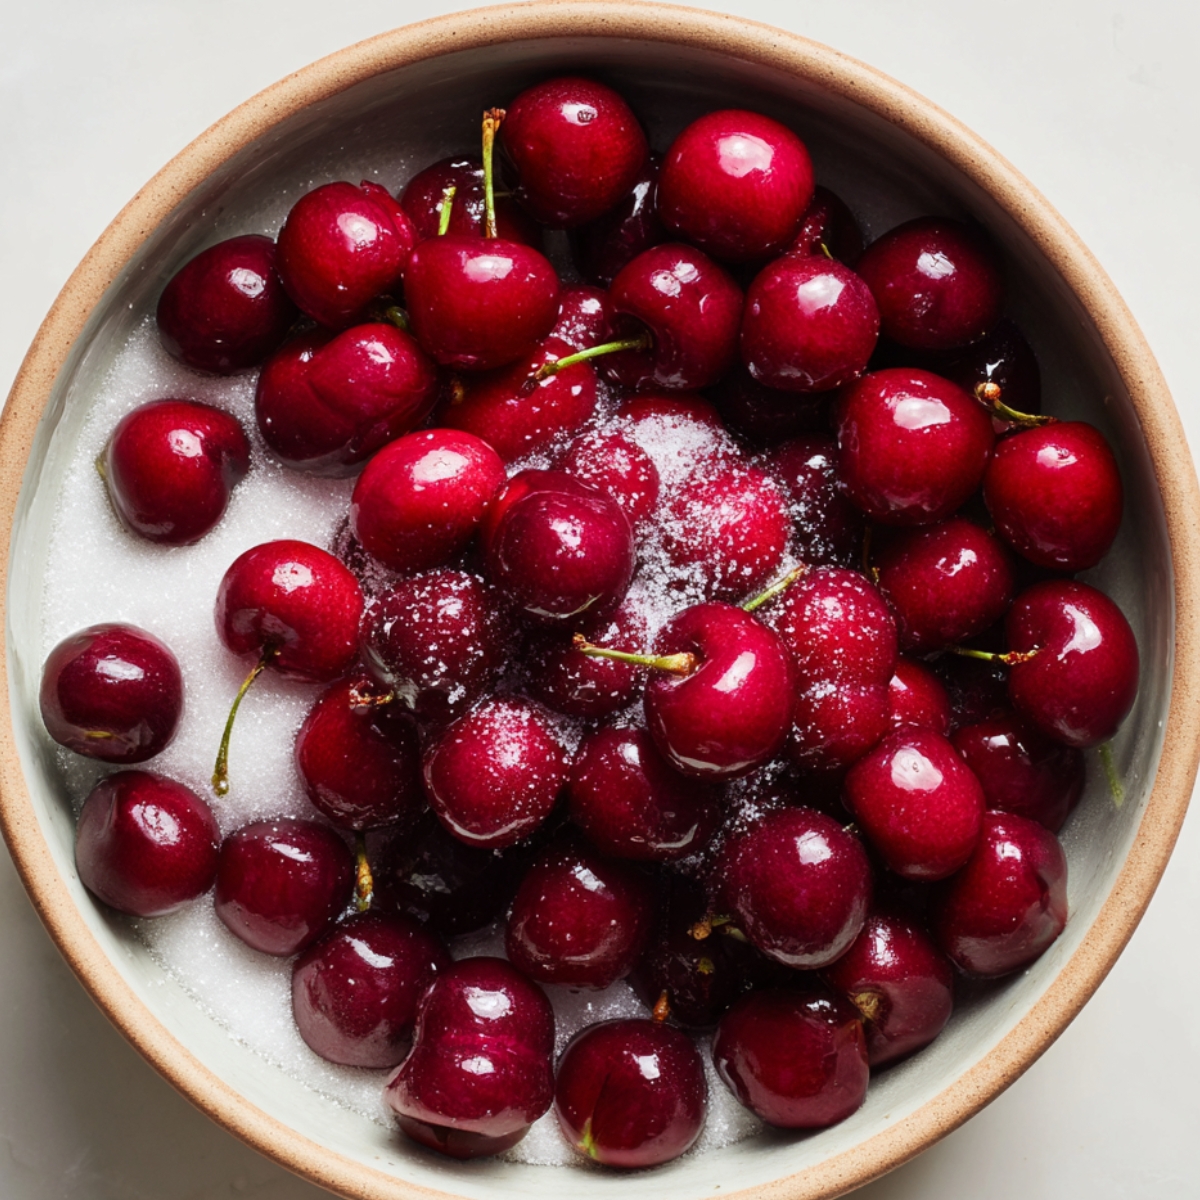
Prepare the Cherry Filling:
- Mix cherries with sugar, cornstarch, and lemon juice in large bowl
- Let sit 10 minutes so cherries release some juice
- Stir in vanilla and pinch of salt
- Taste and adjust sugar if needed
Assemble and Bake:
- Pour cherry mixture into bottom crust
- Dot with small pieces of butter
- Roll out top crust and cut into strips for lattice
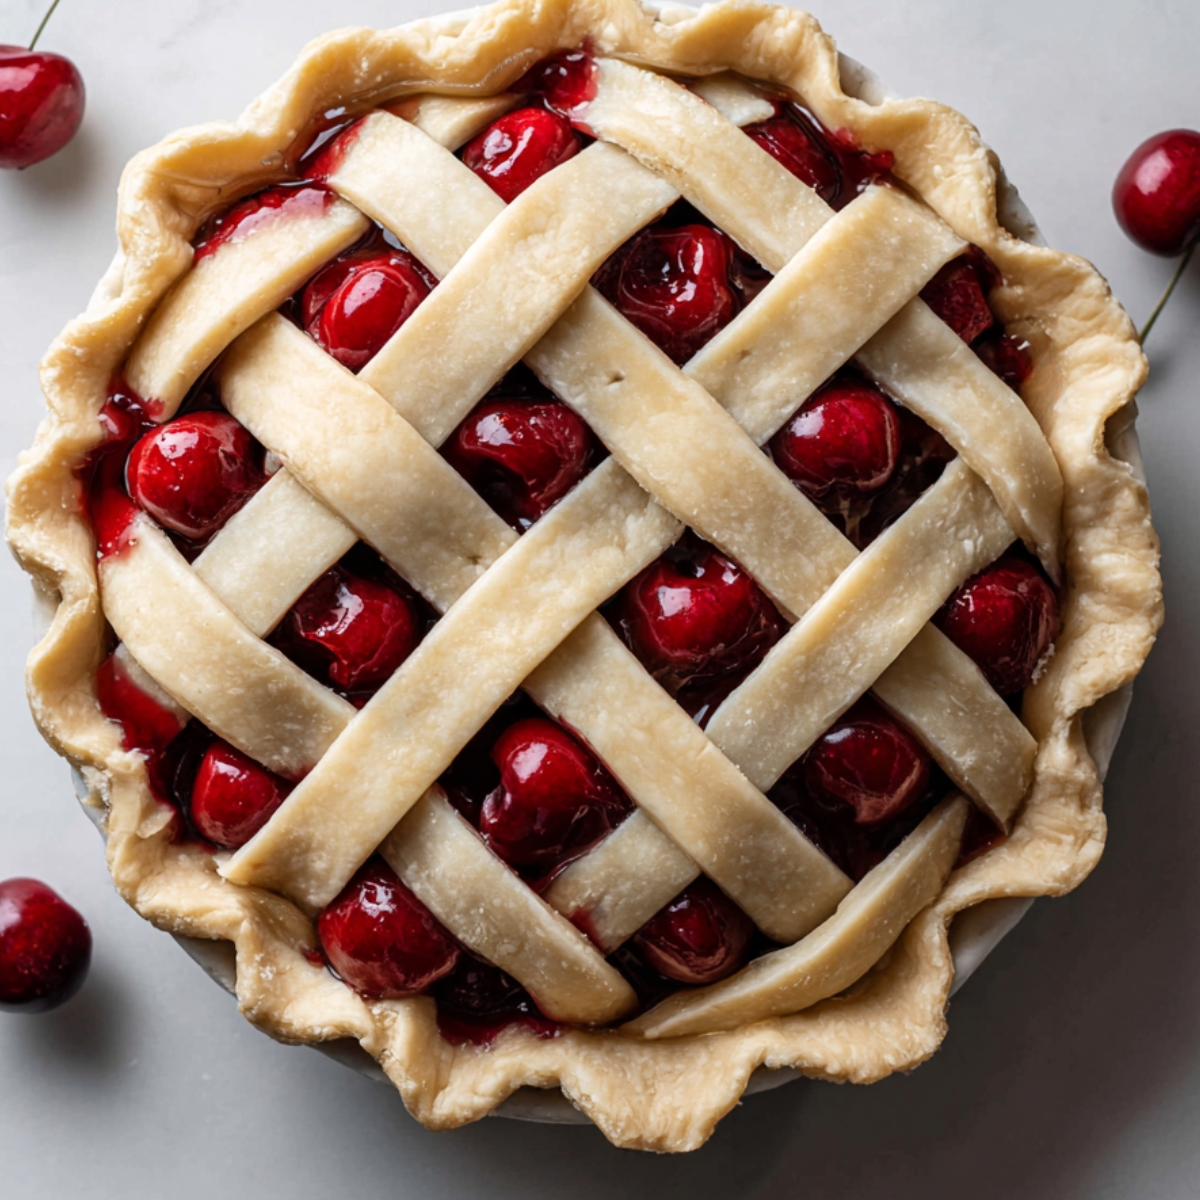
- Weave strips over filling (don't stress about perfection)
- Trim edges and crimp to seal
- Brush with egg wash and sprinkle with sugar
The Baking Process:
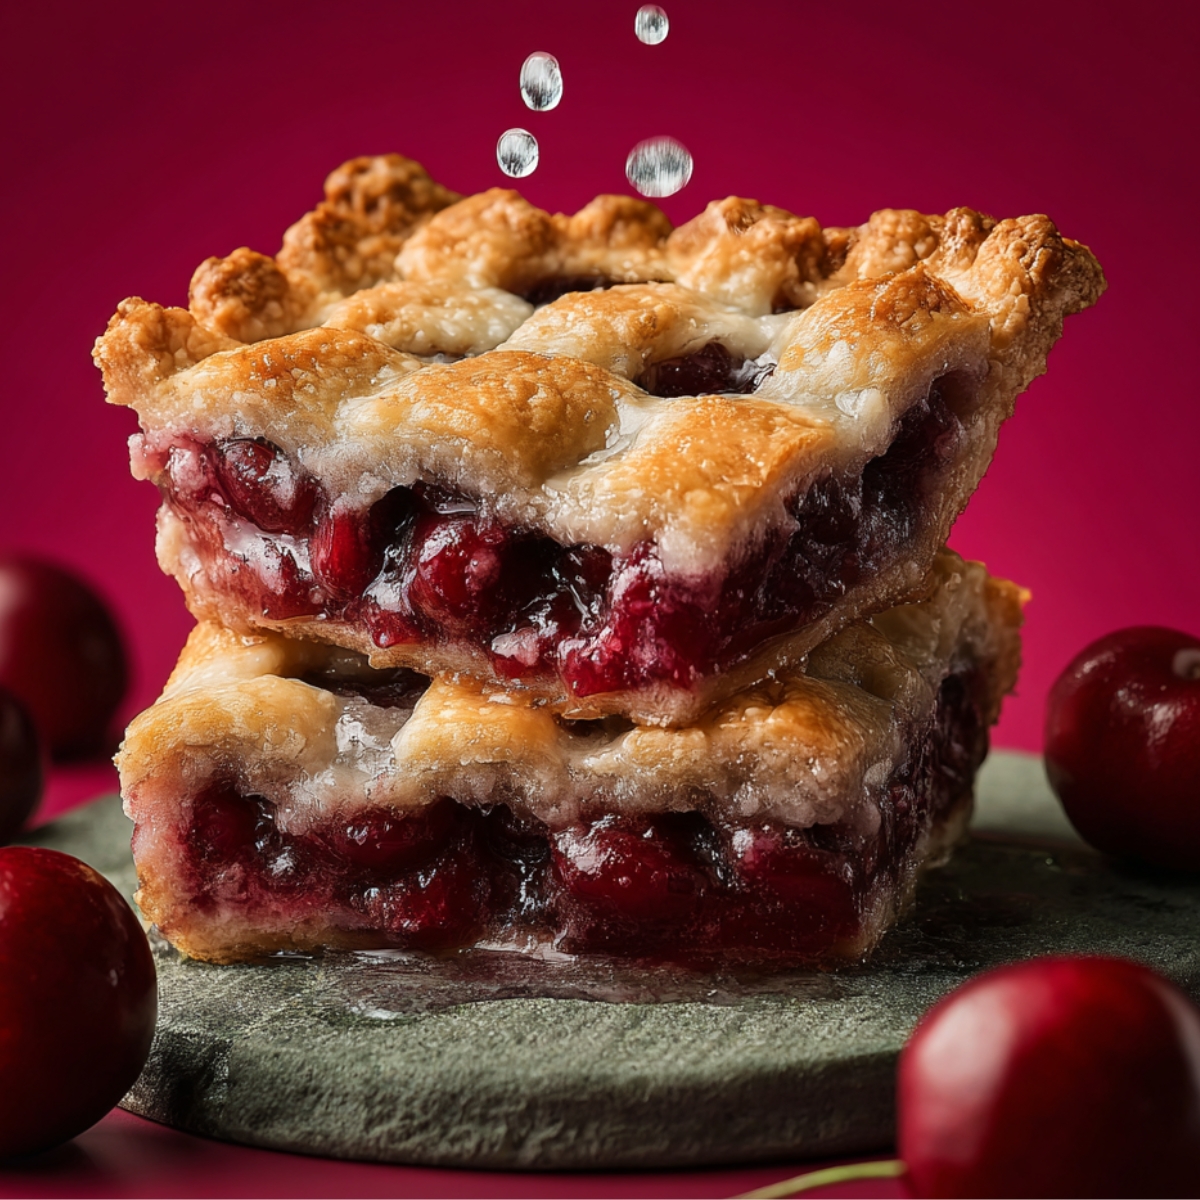
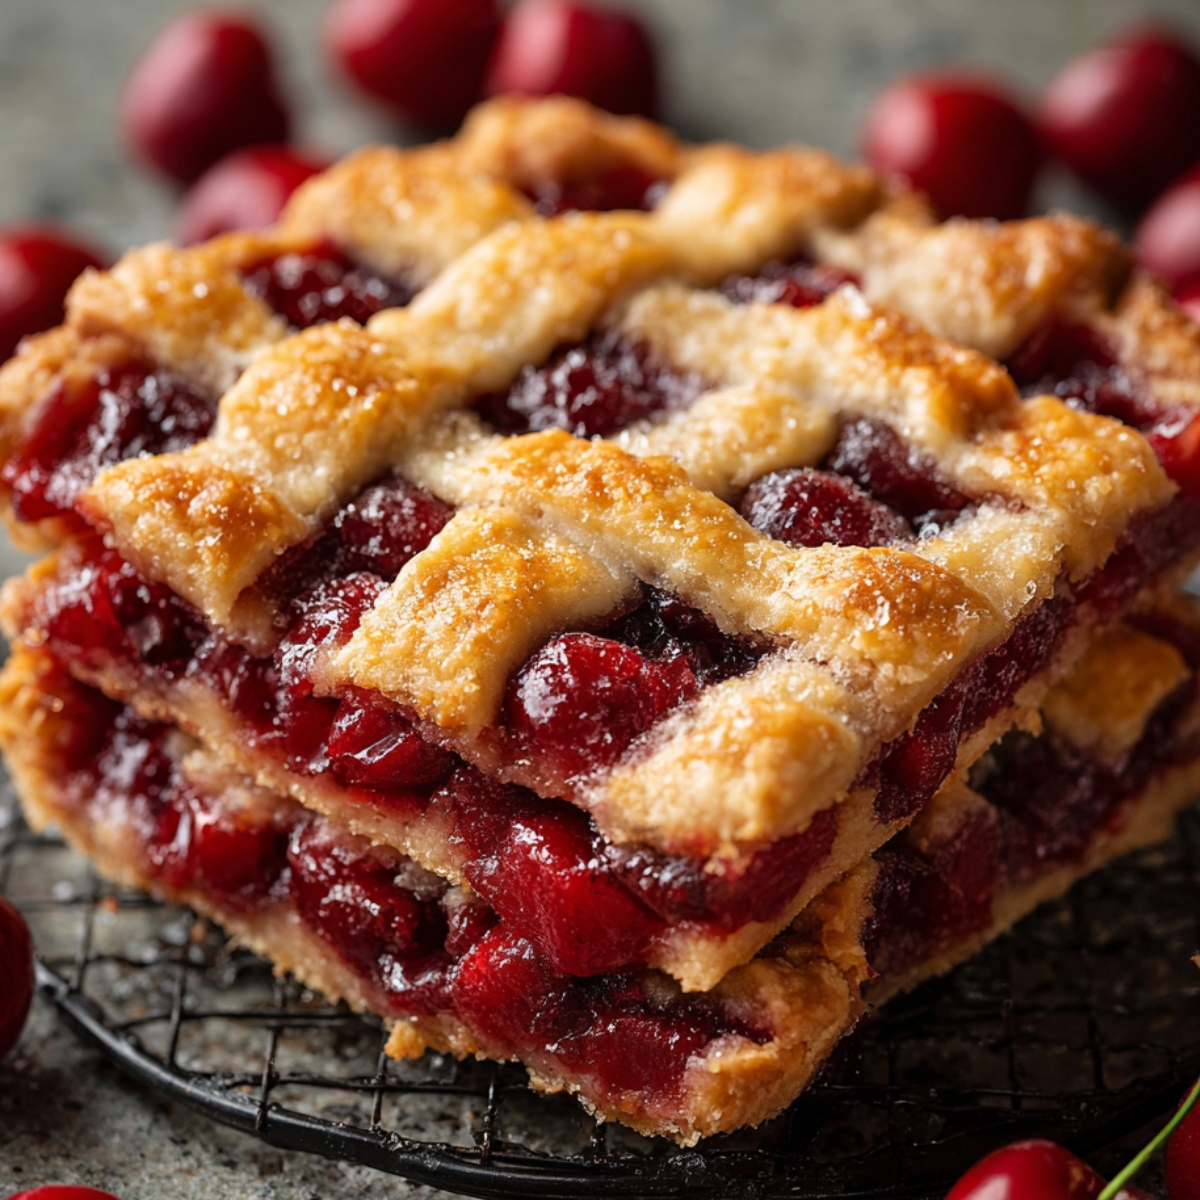
- Cool completely before slicing (this is the hardest part)
- Start at 425°F for 15 minutes
- Reduce to 375°F and bake 35-45 minutes more
- Look for bubbling filling and golden crust
Smart Swaps for Your Cherry Pie Recipe
Cherry Options:
- Fresh tart cherries → Frozen (thaw and drain first)
- Tart cherries → Sweet cherries (reduce sugar by ¼ cup)
- Fresh → Canned (drain well, save some juice)
- Single variety → Mix tart and sweet cherries
Thickening Alternatives:
- Cornstarch → All-purpose flour (use double the amount)
- Cornstarch → Tapioca starch (same amount)
- Cornstarch → Instant tapioca (crush it first)
Crust Shortcuts:
- Homemade → Store-bought refrigerated crust
- Butter → Vegetable shortening (different texture but works)
- All-purpose flour → Pastry flour for more tender crust
Dietary Swaps:
- Regular sugar → Coconut sugar (same amount)
- Butter → Vegan butter substitute
- Egg wash → Milk for brushing top
Time-Saving Options:
- Scratch crust → Graham cracker crust for no-bake version
- Lattice top → Simple top crust with vents
- Fresh filling → Canned cherry pie filling (doctor it up with lemon and vanilla)
Cherry Pie Variations
Cherry Almond Pie:
- Add ½ teaspoon almond extract to filling
- Sprinkle sliced almonds on top before baking
- Use almond extract in crust instead of vanilla
- Safa calls this the "fancy version"
Mixed Berry Cherry:
- Replace 1 cup cherries with blueberries or blackberries
- Adjust sugar based on berry sweetness
- Creates beautiful color contrast
- Great when cherry season ends early
Chocolate Cherry:
- Add ½ cup mini chocolate chips to filling
- Sprinkle cocoa powder in crust
- Drizzle melted chocolate over cooled pie
- Perfect for chocolate lovers
Spiced Cherry:
- Add cinnamon and nutmeg to filling
- Pinch of cardamom for something different
- Works especially well with tart cherries
- Reminds me of holiday flavors
Crumb Top Version:
- Skip lattice, make streusel topping instead
- Mix flour, butter, brown sugar, and oats
- Easier than weaving strips
- Great for beginners
Cherry Cream Cheese:
- Spread sweetened cream cheese on bottom crust first
- Add regular cherry filling on top
- Creates layered flavor
- Very popular at potlucks
Storing Your Cherry Pie
Counter Storage (2-3 days):
- Cool completely before covering
- Leave uncovered first day to keep crust crisp
- Cover loosely with foil after that
- Don't refrigerate unless weather is very hot
Refrigerator Storage (5-7 days):
- Wrap well in plastic wrap or foil
- Bring to room temperature before serving
- Or warm individual slices in microwave 20 seconds
- Crust won't be as crispy but filling stays good
Freezer Storage (2-3 months):
- Wrap tightly in plastic, then foil
- Label with date and contents
- Thaw overnight in refrigerator
- Reheat in 350°F oven 15-20 minutes
Reheating Tips:
- Oven works better than microwave for whole pie
- Cover edges with foil to prevent burning
- Heat until filling is warmed through
- Let cool slightly before cutting
Make-Ahead Strategy:
- Crust can be made 3 days ahead and refrigerated
- Bake pie completely, cool, then freeze
- Or freeze unbaked pie and bake from frozen (add 15 minutes)
Equipment
- 9-inch pie pan (glass or metal both work)
- Large mixing bowl for filling
- Rolling pin for crust
- Sharp knife for cutting lattice strips
- Measuring cups and spoons
- Pastry brush for egg wash
Why This Recipe Works
This cherry pie succeeds because it fixes the two main problems that ruin most homemade fruit pies - soggy bottoms and runny filling. The cornstarch amount is calculated for the moisture content of cherries, not just copied from an apple pie recipe. Letting the cherry mixture sit for 10 minutes before baking allows the fruit to release some juice, so you can see exactly how thick your filling will be and adjust if needed. The crust method prevents soggy bottoms without requiring blind baking or special equipment. Starting at high heat sets the bottom crust quickly, then reducing the temperature lets the filling cook through without burning the edges.
Most cherry pie recipes fail because they don't account for the differences between cherry varieties. Tart cherries need more sugar but less thickener because they're naturally firmer. Sweet cherries release more juice and need extra cornstarch to prevent soup. This recipe works with either type because the sugar and thickener amounts can be adjusted based on what you taste during prep. The timing matters too - cooling completely before cutting isn't just a suggestion, it's necessary. Hot cherry filling is basically liquid and will run everywhere if you cut too early. That two-hour cooling period lets everything set up properly so you get clean slices instead of cherry soup in a crust bowl.
Top Tip
- This cherry pie succeeds because it fixes the two main problems that ruin most homemade fruit pies - soggy bottoms and runny filling. The cornstarch amount is figured out for the moisture content of cherries, not just copied from an apple pie recipe. Letting the cherry mixture sit for 10 minutes before baking allows the fruit to release some juice, so you can see exactly how thick your filling will be and adjust if needed. The crust method prevents soggy bottoms without requiring blind baking or special equipment.
- Starting at high heat sets the bottom crust quickly, then reducing the temperature lets the filling cook through without burning the edges. Most cherry pie recipes fail because they don't account for the differences between cherry varieties. Tart cherries need more sugar but less thickener because they're naturally firmer. Sweet cherries release more juice and need extra cornstarch to prevent soup. This recipe works with either type because the sugar and thickener amounts can be adjusted based on what you taste during prep.
- The timing matters too - cooling completely before cutting isn't just a suggestion, it's necessary. Hot cherry filling is basically liquid and will run everywhere if you cut too early. That two-hour cooling period lets everything set up properly so you get clean slices instead of cherry soup in a crust bowl. Mrs. Henderson taught me that patience with cooling is what separates good pie makers from frustrated ones who wonder why their beautiful pie falls apart when they serve it.
They Kept It in the Family for Decades (Now It's Out)
Mrs. Henderson's grandmother never shared her cherry pie secret with anyone outside the family - until she met me crying over my third failed attempt in her driveway. I'd been trying to recreate my own grandmother's cherry pie for months, and every single one had either a soggy bottom or filling that looked like cherry soup. She watched me scrape another disaster into the trash can and finally took pity on me. Her secret wasn't some fancy technique or hard-to-find ingredient. She saved a quarter cup of the cherry juice before mixing the filling, then added it back gradually at the very end if the mixture looked too thick.
The other thing she taught me was to taste the raw filling before it goes in the crust. Not just for sweetness, but for texture too. If a spoonful slides off the spoon too quickly, add more cornstarch. If it clumps and doesn't flow at all, add some of that reserved juice. This simple test tells you exactly what your baked pie will be like, so you can fix problems before they're permanent. Now every cherry pie I make turns out exactly the way I want it, and Safa thinks I'm some kind of pie genius.
FAQ
What kind of cherries are used in cherry pie?
Tart cherries like Montmorency are traditional for cherry pie because they hold their shape during baking and provide nice tartness. Sweet cherries like Bing work too but need less sugar and more thickener. You can also mix both types for balanced flavor.
What is the most famous pie in America?
Apple pie is generally considered America's most famous pie, but cherry pie runs a close second. Both have deep roots in American baking traditions. Cherry pie became especially popular in the Midwest where tart cherry orchards flourished in states like Michigan.
How do you keep the bottom crust of a cherry pie from getting soggy?
Start baking at high temperature (425°F) for the first 15 minutes to set the bottom crust quickly. Don't add extra liquid to your filling, and make sure your oven is fully preheated. A glass pie pan helps you monitor browning.
How to make a cherry pie better?
Taste your cherries first and adjust sugar accordingly. Let the filling sit 10 minutes before baking to check consistency. Don't skip the cooling time - hot filling is liquid and will run everywhere if cut too early. Add a pinch of almond extract for depth.
Time to Bake Summer's Best Dessert!
Now you have all the secrets to making perfect cherry pie that'll have people asking for your recipe. This homemade cherry pie proves that with the right steps and Mrs. Henderson's family tricks, you can create bakery-quality results right in your own kitchen. Safa has declared this "way better than store pie," which coming from someone who usually prefers anything that comes in a package is high praise indeed.
Craving more classic desserts? Try our Apple Crisp Recipe that uses similar fruit-handling methods, master our Peach Cobbler Recipe for when cherry season ends, or explore our Strawberry Rhubarb Pie Recipe that pairs beautifully with this one for summer gatherings. These fruit desserts work together to keep your dessert rotation interesting all season long.
Share your cherry pie success. We love seeing your lattice work and hearing about your family's reactions!
Rate this recipe and join our baking community!

Related
Looking for other recipes like this? Try these:


Pairing
These are my favorite dishes to serve with Cherry Pie Recipe:


cherry pie
Ingredients
Equipment
Method
- Make the crust (mix flour, butter, salt, sugar, add water, chill, roll out bottom crust)

- Prepare the filling (mix cherries, sugar, cornstarch, lemon, rest, add vanilla & salt, taste)
- Assemble the pie (add filling, butter, lattice top, crimp, egg wash, sugar)
- Bake at 425°F then 375°F until golden and bubbling
- Cool completely at room temp before slicing


Leave a Reply