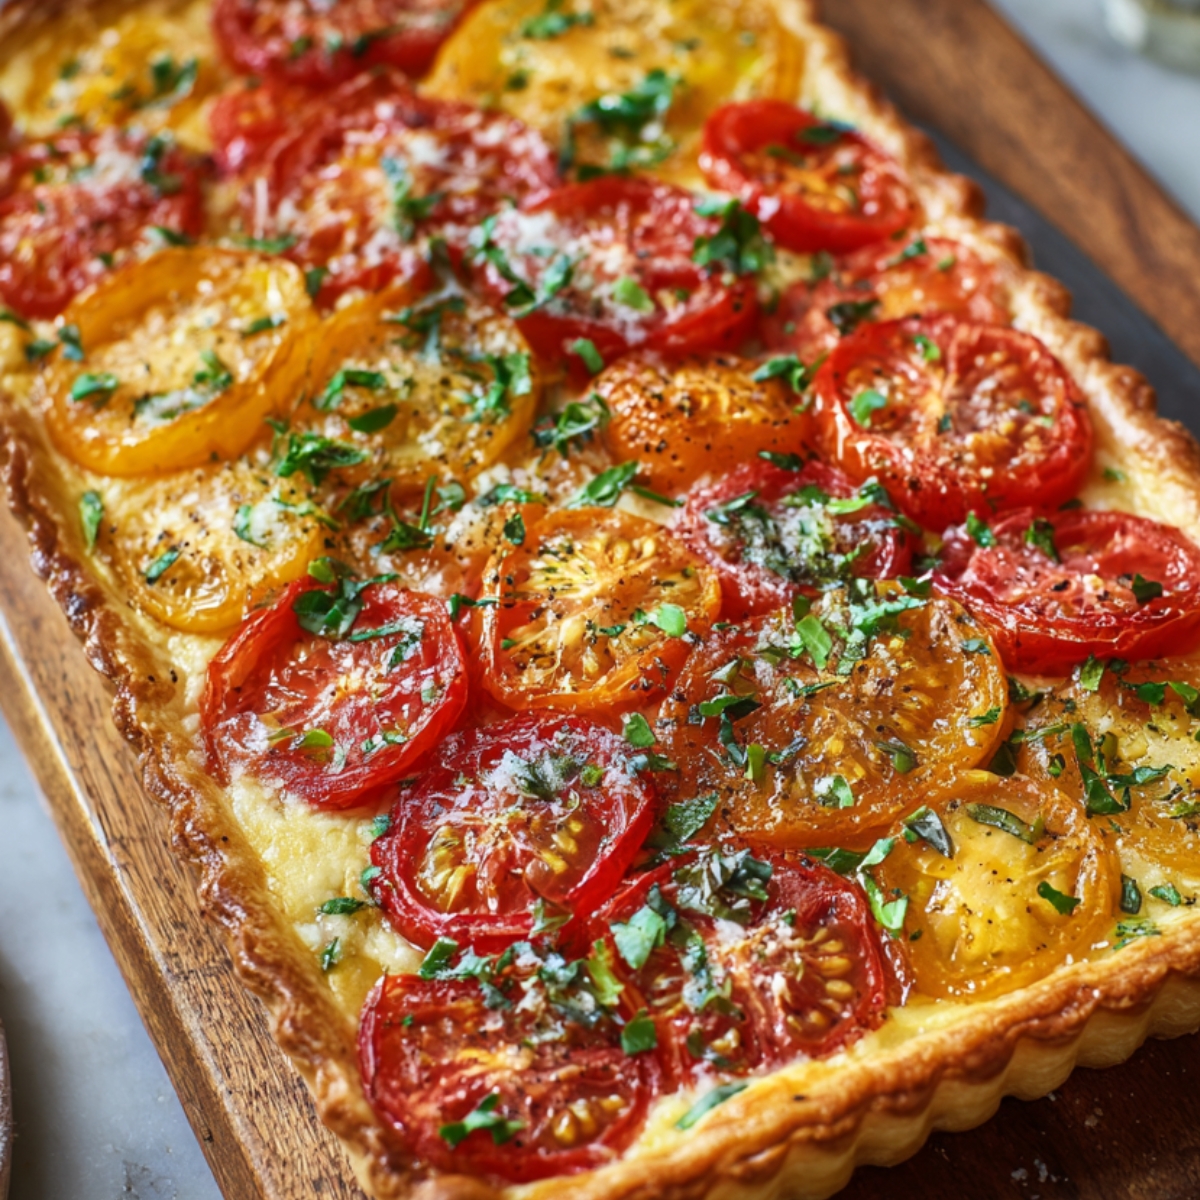
Last summer, while helping my neighbor clear out her late mother's garden shed, we discovered a yellowed recipe card tucked inside an old seed packet. This tomato tart recipe, written in faded pencil, became the foundation for what's now our family's most requested dish during peak tomato season. After making it 23 times last summer alone (Max kept count on our kitchen calendar), I've refined the technique to guarantee that perfect balance of crispy pastry and juicy tomatoes every single time.
Why You'll Love This Tomato Tart
This recipe works when others don't. I've tried at least six different tomato tart recipes from magazines and websites, and most left me with either soggy pastry or bland filling. This one actually tastes like summer.
It's also pretty forgiving. The first time I made it, I forgot to salt the tomatoes and it still turned out okay. When Max decided to "help" by adding extra cheese, it was still delicious. When I burned the edges slightly because I was dealing with a work call, people still asked for the recipe.You can make it ahead too. I've assembled the whole thing in the morning and baked it before dinner guests arrived. The flavors actually get better after sitting for a few hours.
Jump to:
- Why You'll Love This Tomato Tart
- What You Need for Tomato Tart
- How To Make Tomato Tart Step By Step
- Easy Swaps for Tomato Tart
- Fun Ways to Change Up Your Tomato Tart
- Equipment for Tomato Tart
- Storing Your Tomato Tart
- H2: Why This Recipe Works
- Top Tip
- The Recipe My Grandma Wouldn't Let Me Forget
- FAQ
- Time to Make Your Own Summer Masterpiece!
- Related
- Pairing
- tomato tart
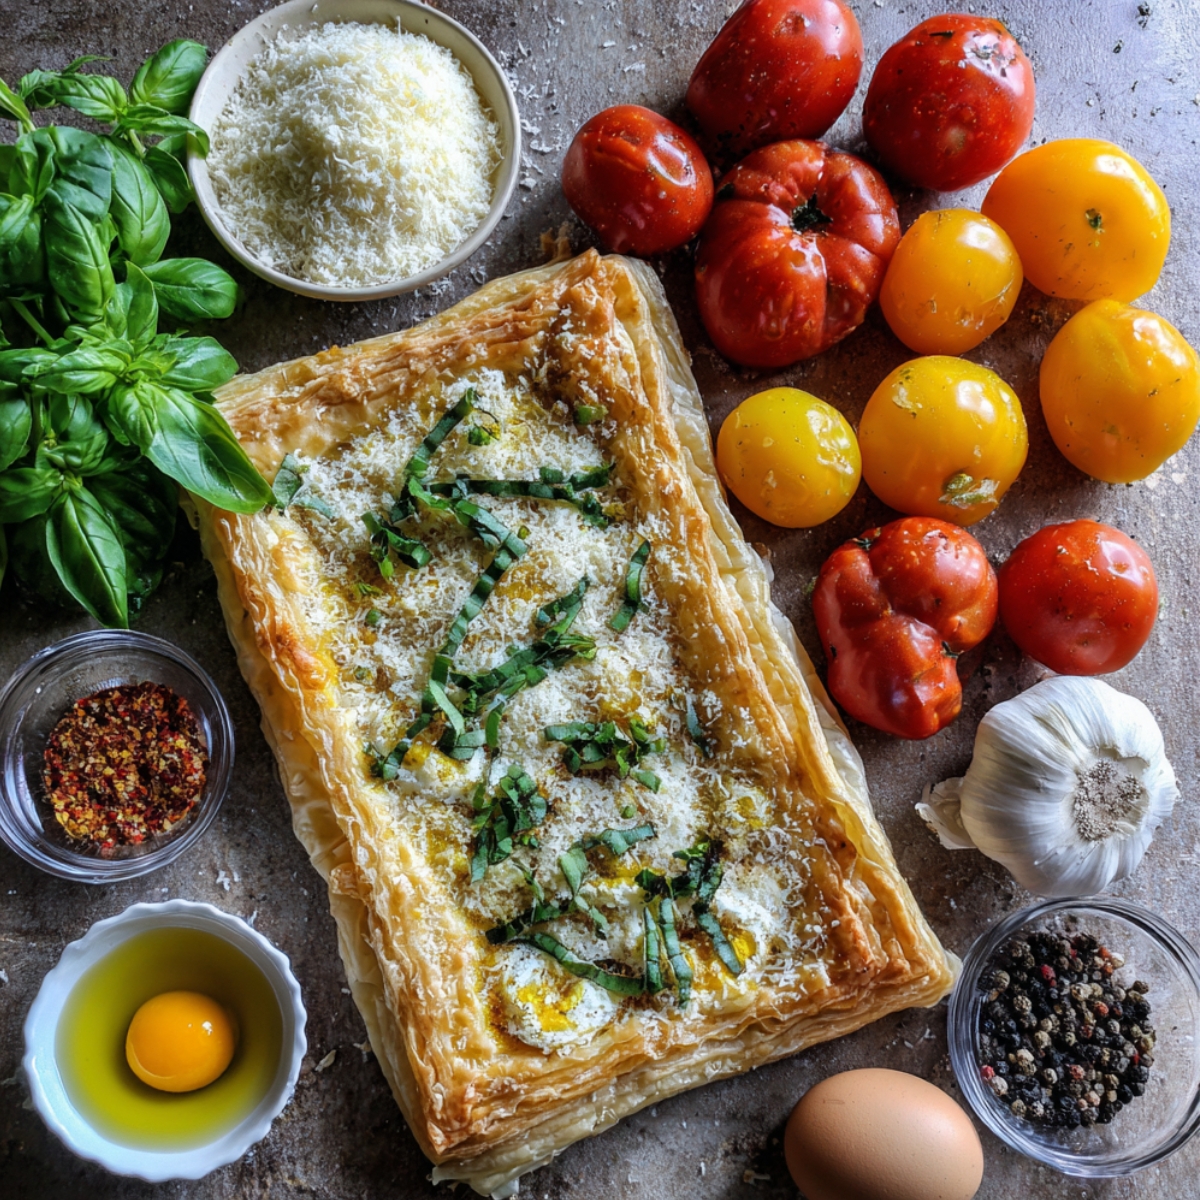
What You Need for Tomato Tart
The Main Stuff:
- Puff pastry from the freezer section
- Tomatoes
- Dijon mustard
- Goat cheese
- Fresh basil
- Olive oil
- Salt and pepper
Nice Extras:
- Parmesan cheese
- One garlic clove
- An egg
Tools:
- Tart pan
- Sharp knife
- Paper towels
- Bowl for mixing
See recipe card for quantities.
How To Make Tomato Tart Step By Step
Get Ready First:
- Thaw your puff pastry completely
- Slice tomatoes into rounds about ¼ inch thick
- If they're really juicy, salt them and let them drain in a colander for 30 minutes
- Pat them dry with paper towels

Prep the Pastry:
- Roll out the puff pastry and press it into your tart pan
- Trim the edges but leave a little overhang
- Prick the bottom all over with a fork
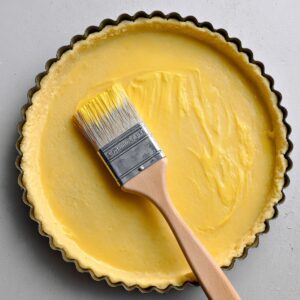
- Brush with beaten egg if you want it extra golden
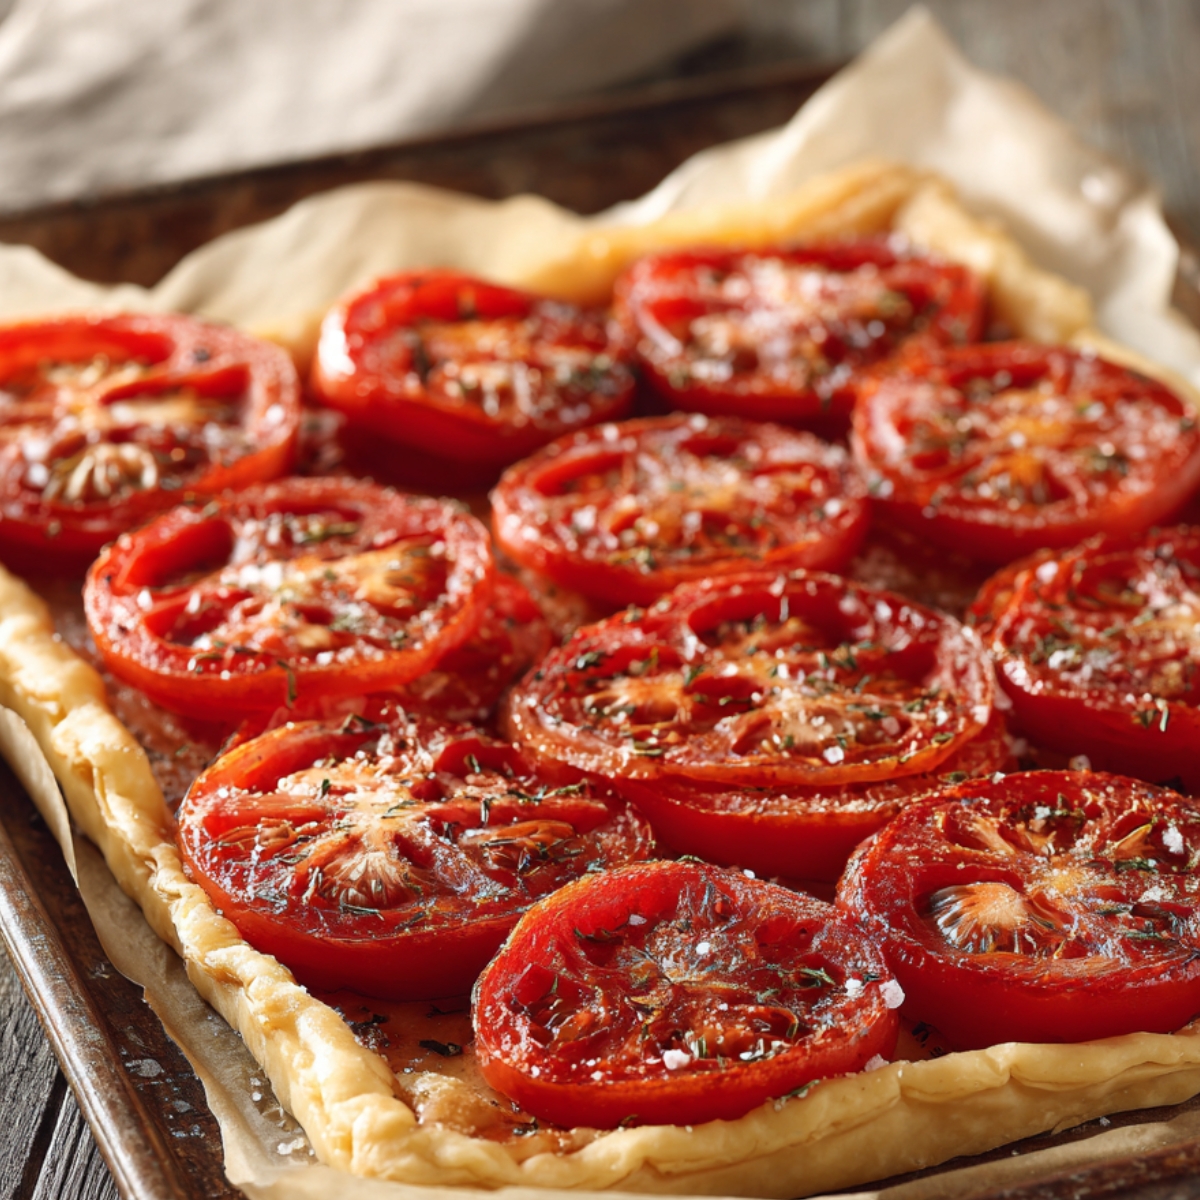
Build Your Tart:
- Spread a thin layer of Dijon mustard on the pastry (this stops it getting soggy)
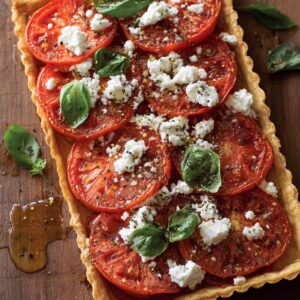
- Crumble the goat cheese evenly over the mustard
- Arrange your tomato slices in overlapping circles
- Drizzle with olive oil
- Sprinkle with salt, pepper, and torn basil leaves

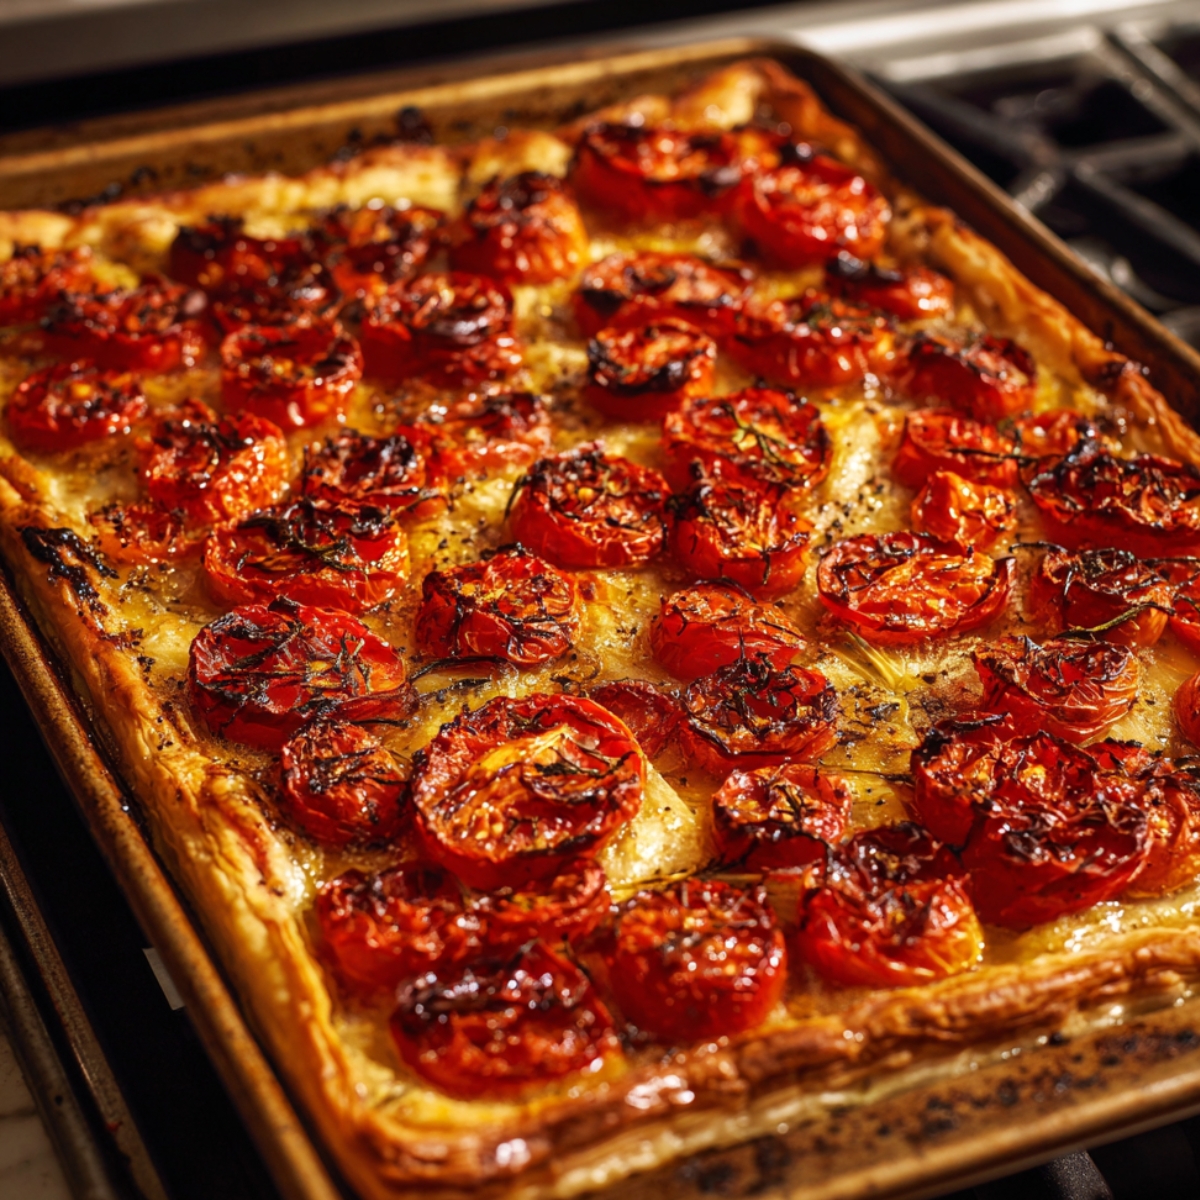
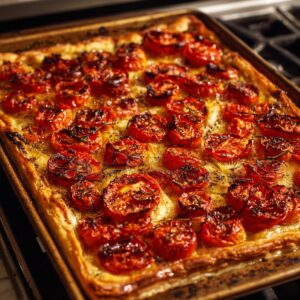
Bake It:
- Start at 425°F for 15 minutes
- Turn it down to 375°F for another 15-20 minutes
- You want the pastry golden and the tomatoes slightly caramelized
Easy Swaps for Tomato Tart
Pastry Options:
- Puff pastry → Pie crust
- Store-bought → Homemade pastry
- Regular → Gluten-free puff pastry
- Frozen → Refrigerated dough
Cheese Swaps:
- Goat cheese → Cream cheese
- Fresh → Ricotta cheese
- Soft → Mozzarella shredded
- Tangy → Feta crumbles
Tomato Types:
- Large tomatoes → Cherry tomatoes
- Fresh → Sun-dried tomatoes
- Heirloom → Regular slicing
- Summer → Grape tomatoes
Herb Changes:
- Fresh basil → Dried basil
- Basil → Fresh thyme
- Single herb → Mixed herbs
- Fresh → Garlic powder
Mustard Options:
- Dijon → Whole grain mustard
- Regular → Honey mustard
- French → Yellow mustard
- Smooth → Grainy texture
Fun Ways to Change Up Your Tomato Tart
Mediterranean Style:
- Add sliced red onion between the tomatoes
- Sprinkle with olives and feta cheese
- Use oregano instead of basil
- Drizzle with balsamic when it comes out
French Herb Version:
- Mix fresh thyme, rosemary, and parsley
- Add caramelized onions under the tomatoes
- Use gruyere cheese instead of goat cheese
Summer Garden:
- Layer in thin zucchini slices
- Add corn kernels between tomatoes
- Fresh chives on top
Simple Cheese Lover:
- Skip the goat cheese, use all parmesan
- Add a layer of mozzarella
- Finish with fresh cracked pepper
Equipment for Tomato Tart
- 9-inch tart pan with removable bottom
- Sharp knife for slicing tomatoes
- Rolling pin
- Large cutting board
- Paper towels
Storing Your Tomato Tart
Same Day Storage:
- Leave at room temperature up to 4 hours
- Cover loosely with foil
- Don't refrigerate right away
- Tastes best when not cold
Refrigerator (2-3 days):
- Cool completely first
- Cover tightly with plastic wrap
- Reheat in 300°F oven for 10 minutes
- Don't microwave - makes pastry soggy
Make-Ahead Tips:
- Prep tomatoes and salt them the night before
- Assemble tart up to 4 hours ahead
- Keep covered at room temperature
- Bake just before serving
What Doesn't Work:
- Freezing ruins the texture
- Leaving out overnight gets soggy
- Reheating multiple times makes it fall apart
H2: Why This Recipe Works
This tomato tart succeeds where others fail because it solves the main problem - soggy pastry. Most recipes don't tell you that tomatoes release a lot of water when they bake, which turns crispy puff pastry into mush.
My method fixes this three ways. First, salting juicy tomatoes draws out excess water before they go on the tart. Second, the thin layer of Dijon mustard creates a barrier between the pastry and tomatoes. Third, starting at high heat sets the pastry before the tomatoes start releasing moisture.The timing matters too. I've tested this recipe with different oven temperatures and found that 425°F for the first 15 minutes crisps the bottom, then 375°F finishes cooking without burning the edges.
Using room temperature ingredients helps everything bake evenly. Cold tomatoes and cheese create steam pockets that make the pastry uneven.The recipe is also forgiving with ingredient swaps. I've made successful versions with different cheeses, herbs, and even store-bought tomatoes when good ones weren't available. The basic technique stays the same.
Top Tip
- Last summer, Max was helping me arrange the tomatoes and kept asking why some looked shinier than others. I realized I'd been brushing some with olive oil but not others. That's when we stumbled on our favorite trick.
- After laying out all the tomatoes, we brush each slice with a mixture of olive oil and just a tiny bit of honey. Maybe half a teaspoon of honey mixed into two tablespoons of oil. The honey helps the tomatoes caramelize without getting too sweet, and they get these beautiful golden edges.
- Max also discovered that sprinkling a little coarse salt on top right before baking makes a huge difference. Not table salt - the bigger crystals you can actually see. It gives little bursts of flavor and makes the whole thing look more professional.
The Recipe My Grandma Wouldn't Let Me Forget
My grandmother made this tomato tart every August when her garden was overflowing. She'd call me over to help, but really she just wanted to make sure I was watching how she did it. "Pay attention," she'd say, "because someday you'll want to remember this."She had her own way of doing things. Instead of just salting the tomatoes, she'd lay them on old kitchen towels and sprinkle them with coarse salt, then let them sit in the sun on her back porch for exactly 30 minutes. "The sun draws out the water better than anything," she'd explain.
Her real trick was with the mustard. She'd mix Dijon with a tiny bit of cream cheese to make it spread easier and stick better to the pastry. This created an even thicker barrier against moisture, and the cream cheese added richness without changing the flavor much.But what I remember most was how she'd test if it was done. She'd gently shake the pan - if the center jiggled even a little, it needed more time. "A proper tart holds together," she'd say. She was right. Her tarts never fell apart when you cut them.
FAQ
Does tomato tart need to be refrigerated?
Fresh tomato tart is best at room temperature for up to 4 hours after baking. If you need to store it longer, refrigerate it but bring it back to room temperature before serving. Cold tart doesn't taste as good and the pastry gets tough.
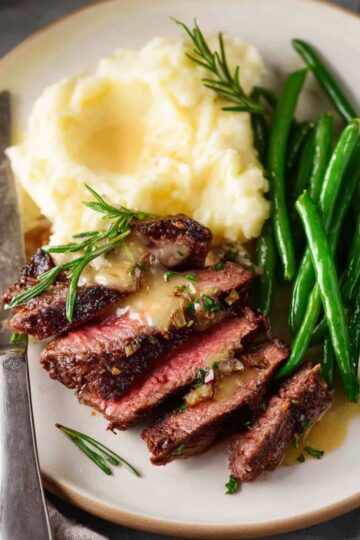
What to have with a tomato tart?
This pairs well with a simple green salad dressed with lemon vinaigrette. For heartier meals, serve it alongside grilled chicken or fish. It also works great as part of a summer spread with crusty bread, olives, and cheese.
How to make tomato tarts?
The key steps are: salt juicy tomatoes ahead of time, brush pastry with mustard to prevent sogginess, layer cheese then tomatoes, and bake at high heat first then lower. Proper moisture control keeps the bottom crispy.
Can you reheat a tomato tart?
Reheat leftover tomato tart in a 300°F oven for 8-10 minutes to crisp up the pastry. Don't use the microwave - it makes everything soggy. Honestly though, this tart is best eaten fresh and doesn't keep well as leftovers.
Time to Make Your Own Summer Masterpiece!
Now you have everything you need to make this gorgeous tomato tart from picking the right tomatoes to our secret honey-oil trick. This recipe proves that simple ingredients can create something really special when you know a few key techniques.
Want more summer recipes that make you look like a pro? Try our Easy Italian Tiramisu Recipe that's perfect when stone fruits are in season. For something savory, our Delicious lobster salad Recipe is another great way to use garden vegetables. And our Healthy Chicken Avocado Melt Sandwich Recipe pairs beautifully with this tart for entertaining.
Share your tomato tart pictures! We love seeing how yours turns out and hearing what your family thinks!
Rate this recipe and let us know how it worked for you!
Related
Looking for other recipes like this? Try these:


Pairing
These are my favorite dishes to serve with Tomato Tart


tomato tart
Ingredients
Equipment
Method
- Let the puff pastry fully thaw before working with it to avoid cracks or tearing.

- Cut the tomatoes into ¼-inch rounds using a sharp knife for even baking and presentation.
- Sprinkle sliced tomatoes with salt and place them in a colander to drain excess moisture.
- After draining, pat the tomatoes dry using paper towels to prevent a soggy tart.
- Roll out the pastry, press it into a tart pan, trim the edges slightly, and prick the bottom with a fork.


Leave a Reply